
AI Photo Edit Rules for Honest Camera Reviews
A phone camera review becomes unreliable when the sample image quietly changes after capture. Basic resizing and compression may be necessary for the web, but an AI Photo Editor can also remove objects, change backgrounds, enhance detail, and restyle a frame. Those capabilities are useful for article production. They must not be confused with evidence of what a camera sensor, lens, and processing pipeline produced.
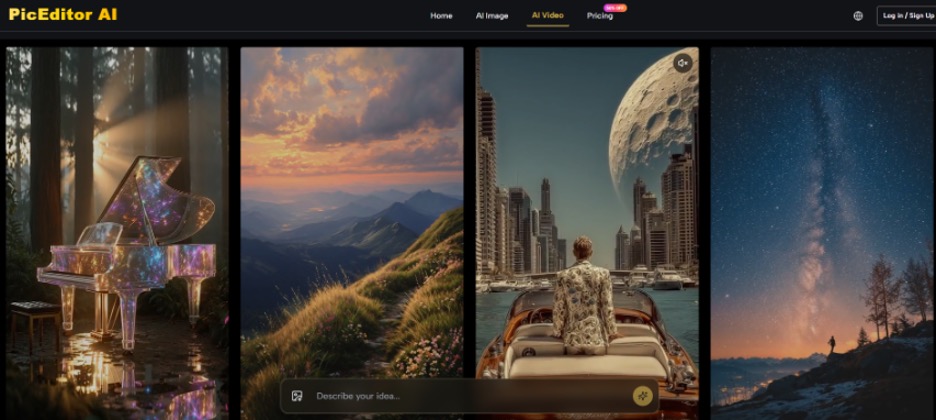
A single PicEditor AI interface covers both practical cleanup and larger generative changes. The homepage accepts JPEG, PNG, and WEBP files up to 30 MB and offers actions such as background removal, object erasing, enhancement, and upscaling. A reviewer therefore needs a clear boundary between editing a page asset and editing a camera sample.
Keep Camera Evidence on a Separate Track
The untouched capture is the reference record. Preserve the original file, its metadata, its native dimensions, and the sequence in which it was shot. Do not upload the only copy to an editing workspace. Duplicate the selected frame for layout work and make the new filename show that it is derived.
This separation prevents two common mistakes. First, a cleaned image may be mistaken for the phone’s actual output during later comparisons. Second, a web producer may replace the original sample because the edited file looks more polished in the article. Once that happens, the review can no longer defend its claims about noise, colour, edge detail, or low-light behaviour.
Mark Every Derived File Before Editing
Use a plain suffix such as “layout,” “labelled,” or “illustrative edit.” Avoid “final,” because that says nothing about provenance. Store the source and derived asset in different folders, and include a note in the article system when a picture is a demonstration rather than a camera sample. A clear label is faster than trying to reconstruct the workflow after publication.
Match the Edit to the Editorial Claim
Different article sections make different promises. A gallery titled “camera samples” promises direct evidence. A header image only needs to introduce the story. A tutorial may need arrows, crops, or a cleaned background to show a control. The acceptable edit depends on that promise, not on whether the output looks realistic.
- Camera sample: resize and compress only under the publication’s standard policy; disclose any other change.
- Article hero: a clearly labelled illustrative edit may be acceptable if it does not masquerade as sensor output.
- UI tutorial: crop, annotate, and improve legibility while keeping button names and states exact.
- Accessory photo: remove temporary clutter only if the edit does not alter the product under review.
- Concept image: state that it is generated or edited rather than photographed by the device.
This editorial map is the test protocol. It tells the team what can pass before a file enters PicEditor AI. Without it, a producer may enhance a noisy night shot for visual consistency while the reviewer is using that same noise to judge the phone. The result can look fine in the article but make the written conclusion impossible to defend.
The policy should also cover comparison layouts. If two phones are shown side by side, both samples need the same resizing, compression, and display treatment. Enhancing only the darker frame changes the comparison. Generating extra space around one subject can also make field of view appear different. Build the layout from duplicated source files, record the common treatment, and keep a link back to each untouched capture inside the editorial system.
Social promotion needs a separate export. A dramatic crop or cleaned desk can work for the post that introduces the review, but it should not be recycled into the evidence gallery. Add the article title or a small “illustration” label in the layout layer rather than asking the image model to recreate tiny interface text. Exact lettering remains easier to correct and translate when it stays editable.
Use Narrow Prompts for Production Assets
When the file is not evidence and editing is allowed, request one visible change at a time. The Photo Editing Tool follows three core moves: upload a reference, describe the edit, and generate with chosen settings. A narrow prompt should name both the change and the details that must remain fixed.
For a phone-on-desk hero image, a useful request might be: “Remove the loose charging cable from the left edge. Keep the phone body, camera module, screen text, reflections, desk grain, and shadow unchanged.” That instruction gives the editor a smaller job and gives the reviewer a concrete comparison. “Make this look like a premium technology advertisement” does neither.
Check Labels Reflections and Device Geometry
Generative cleanup can rebuild nearby pixels. Inspect model names, regulatory marks, port openings, lens count, button positions, screen text, and straight edges beside the source. Reject an output if a camera ring changes diameter, an invented second speaker appears, a reflection hides a scratch relevant to the review, or small interface text becomes unreadable.
The same discipline applies to an AI Photo Edit used for a tutorial screenshot. If the change is meant to remove a personal notification, keep the operating-system version, menu path, toggle state, and button text intact. A prettier screenshot with altered controls creates rework for readers and support staff because the instructions no longer match the pictured interface.
Build a Review Gate Before Publication
A technology site can add a small gate without slowing the newsroom. The producer compares the edited file with the source at the same size. The reviewer checks whether the asset’s label matches its role. The editor confirms that any material change is disclosed in the caption or surrounding text.
The pass decision should be observable. A device keeps the same geometry and labels. A camera sample retains its original image content. A tutorial still shows the exact interface state. A concept image is not presented as a capture. Anything that fails one of those checks never reaches the publishing queue, even when it is visually stronger.
Keep one rejected example for each recurring mistake: invented hardware detail, changed UI text, hidden surface damage, or a crop that removes relevant context. These examples teach the policy more effectively than a vague instruction to “use AI responsibly.” They also shorten future review because the team can point to a known failure instead of reopening the entire argument.
PicEditor AI offers output size, resolution, number-of-images, and Public Visibility controls in its Photo Editing Tool. Choose those settings according to the article destination. Public visibility deserves an explicit check when the image contains an unreleased device, account information, or private notifications. The interface control helps, but the newsroom still needs its own handling rule.
Finally, inspect the published page on both a phone and a large screen. Mobile compression may turn fine text into a blur, while a desktop crop may expose an invented edge that was outside the smaller view. Approval of the generated file is provisional until the delivered page shows the same device facts and the caption still explains the asset’s role.

Protect the Benchmark and Edit the Page
Technology publications can use PicEditor AI to prepare cleaner heroes, safer tutorials, and alternate crops without rebuilding every asset manually. It should not improve the very evidence a review claims to measure.
The practical boundary is easy to remember: keep the benchmark untouched and use editing around it. When source samples, derived assets, and illustrative images stay on separate tracks, the article can look polished without asking readers to trust a camera result that never existed.
