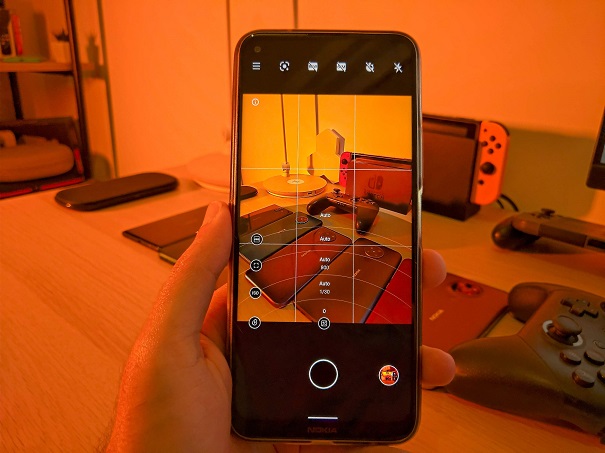
Video: How to Use Manual Camera controls on your phone (Pro Mode)

For most people, using the auto settings on a modern smartphone is all they require. This is especially true now that smartphone cameras have become smarter and smarter over the years, enabling even the most tech-illiterate person to capture good images. But what if you didn’t like the tone, colors, brightness, or ambiance that your phone camera created by default? Wouldn’t you at least want to know what all the settings in pro mode do? What does shutter speed, ISO, exposure, manual focus, and white balance mean? This is where this tutorial will come in hand.
[youtube https://www.youtube.com/watch?v=tuHnz8yBEno&w=560&h=315]
I also brought in a friend from the past, the Lumia 1020, because I think it has one of the best built-in tutorials for pro controls. In fact, I think this phone taught me more about these granular controls than anything else!
Exposure
Have you ever captured an image and the image was too bright or too dark? This is where exposure compensation can help. It enables you to control the brightness of the image. Most modern phones try to balance between the shadows and bright areas of the images using HDR, but if want to manually adjust this, here is how.
Tip: Unless aiming for a specific look (wanted to overexpose or underexpose an area on purpose, I usually leave the exposure at 0.
Shutter speed
Sometimes, you want to capture images as quickly as possible so you don’t miss the action or get a blurry image. Other times, you want to leave the camera sensor open to capture as much light as possible, to create a cool light trail or smooth water effects. This is what shutter speed is all about. It controls exactly how long the camera shutter stays open, usually measured in seconds.
But there’s an important caveat as this also affects how much light your camera can capture The longer the shutter speed, the more light is captured and if you leave the shutter on for too long, you will most likely end up with a blurry image unless you use a tripod, so you need to find the right balance.
Also, if you’re wondering why phones with OIS can capture more light, its because it can by default leave the shutter open for a bit longer and counteracts to your hands movement.
Tip: When handheld, I usually don’t go above 1/4 second shutter speed, otherwise the image will most likely be blurry unless you’re leaning on something or have super steady hands.
ISO (Light Sensitivity)
Noise is a photographer’s worst enemy. If you’ve captured an image and thought the quality looks terrible because the image looks grainy, you’ve encountered noise. Now, what if I told you you could control how much noise is in an image?
This is where light sensitivity or ISO comes in. It actually controls how much light is artificially added to an image, but the higher the ISO, the more light is added, and the noisier the image is! The lower the ISO, the less light is added, and the cleaner, the better quality the image is. Let me show you.
Tip: Try to keep the ISO as low as possible. Anything over 800 would result in a grainy image. However, if you’re in dim conditions and want to capture details in the light, it’s better to have a grainy image than a totally dark one. If your phone makes your lowlight pictures look too bright and it ruins the effect you are going for, reducing the ISO is the best solution!
Manual focus
Now this one shouldn’t require too much explanation. It just gives you control over where you want the plane of focus to be. Whether you want it as close as possible to the camera, for close-ups and cool bokeh effects, aka that natural blur behind the subject, or you want to capture the horizon, or anywhere between those two, this is what manual focus enables you to do.
Tip: Unless you are 100% sure your subject is in focus, keeping the focus on auto and tapping on the subject might be the easiest most convenient option.
White balance
Ever taken a picture that ended up looking too blue, or too yellow? Then you’ve encountered white balance. It measures the temperature of the light in the image and is measured in kelvin. The lower the temperature, the bluer the white light will appear, the higher the temperature, the more yellow the white light will appear.
So the next time your phone gets the tone wrong, you can play around with white balance to fix this.
Tip: Unless you’re aiming for an artistic effect, I usually leave this in auto. Modern smartphones are really good at getting a balanced white balance.
You will notice that sometimes when you temper with white balance, iso, or shutter speed, the other two will also change automatically. This is where practice makes perfect because they all work together in unison to control how much light is in an image. The key is to find the right balance between these 3. I keep the ISO as low as possible, and I don’t go over 1/4 in handheld for the shutter speed, but play around and find the right balance and effect for you!
So, I tried to keep this as simple as possible. Do you have any specific tips you would like to share? Let us know in the comments!


